You need to capture a bug for support, save a conversation for reference, or create a tutorial. But you’re fumbling with keyboard shortcuts, your screenshot saved to the wrong location, or you can’t figure out how to capture just one window without the desktop background.
Taking screenshots on Mac should be simple, but macOS offers so many methods that it’s easy to miss powerful features hiding in plain sight.
Whether you’re a new Mac user learning the basics or a power user looking for advanced techniques, this complete guide covers every screenshot method available on macOS in 2025, from native keyboard shortcuts to professional third-party apps that can transform your workflow.
Here’s every macOS screenshot method at a glance. Bookmark this table for quick reference:
| What to capture | Keyboard shortcut | Result |
|---|---|---|
| Entire screen | Shift + Command + 3 | Saves to desktop |
| Entire screen (clipboard) | Ctrl + Shift + Command + 3 | Copies to clipboard |
| Selected area | Shift + Command + 4 | Saves to desktop |
| Selected area (clipboard) | Ctrl + Shift + Command + 4 | Copies to clipboard |
| Specific window | Shift + Command + 4, then Spacebar | Saves to desktop |
| Screenshot app/menu | Shift + Command + 5 | Opens Screenshot app |
| Touch Bar (legacy) | Shift + Command + 6 | Saves to desktop |
Pro tip: Add Control to any screenshot shortcut to copy to clipboard instead of saving a file. This is perfect when you need to paste directly into an email or document.
macOS includes powerful built-in screenshot tools that handle most needs without third-party apps. These methods work on all modern versions including Tahoe, Sequoia and Ventura.
Press Shift + Command + 3 together to instantly capture your entire screen.
What happens:
When to use it: Quick full-screen captures for presentations, sharing your entire workspace, or documenting multi-window setups.
Variations:
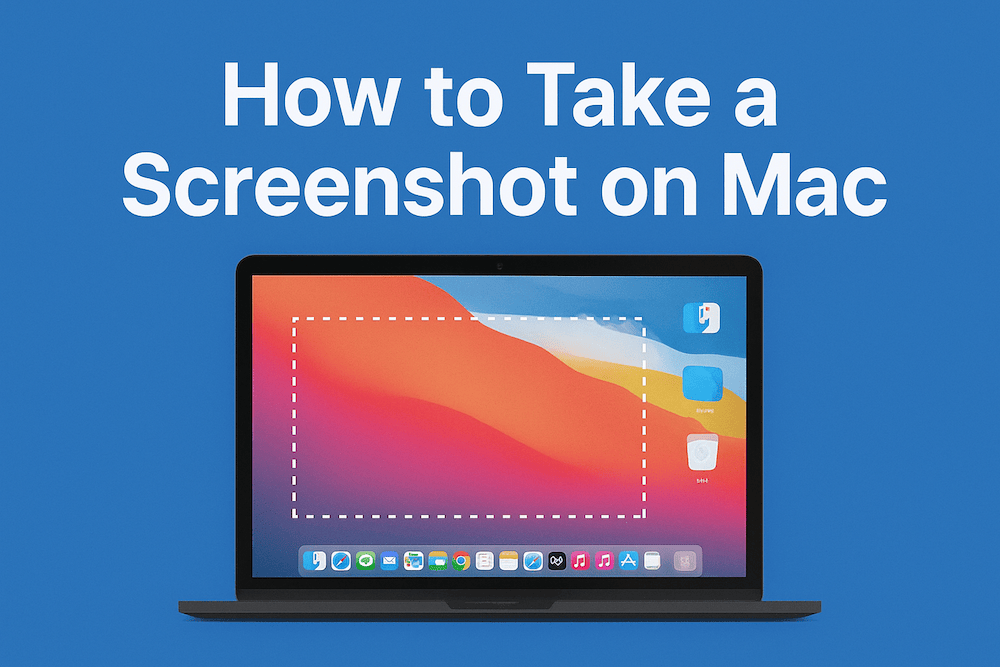
Ctrl + Shift + Command + 3 to copy the screenshot to clipboard insteadPress Shift + Command + 4 to turn your cursor into a crosshair, then drag to select the area you want to capture.
How it works:
Escape to cancelAdvanced techniques while selecting:
Spacebar while dragging to move the entire selection areaShift to lock one dimension and resize only horizontally or verticallyOption to expand the selection from the center instead of a cornerEscape to cancel the screenshotWhen to use it: Capturing specific UI elements, cropping out sensitive information, or grabbing just the relevant portion of content without unnecessary context.
Copy to clipboard: Press Ctrl + Shift + Command + 4 for the same selection tool but copying to clipboard instead of saving.
Press Shift + Command + 4, then press Spacebar to change the cursor from crosshair to a camera icon. Click any window to capture it.
What makes this special:
Advanced tips:
Option while clicking to capture the window without the shadow (perfect for documentation)When to use it: Creating software documentation, sharing specific application windows without desktop clutter, or capturing error dialogs for support tickets.
Example use case: Imagine you need to report a bug in Safari. Using this method captures only the Safari window with a clean shadow, excluding your messy desktop and personal browser tabs from other windows.
Press Shift + Command + 5 to open the Screenshot app, macOS’s most powerful built-in screenshot tool introduced in Mojave 10.14.
What you get: A floating toolbar with capture options, recording controls, and settings:
Capture buttons (left section):
Options button (center):
When to use it:
Hidden features:
Example workflow: You’re creating a tutorial and need to capture multiple screenshots of the same menu area. Open Screenshot app, select the area once, enable “Remember Last Selection,” and each subsequent screenshot captures the exact same region.
macOS Tahoe 26 introduces powerful new screenshot and screen recording capabilities for supported Mac models.
Record Selected Window:
The Screenshot app now includes a sixth button: Record Selected Window. This allows you to record a specific application window instead of the entire screen or a manually selected portion.
How to use it:
Shift + Command + 5Why this matters: Previously, you could only record the entire screen or a selected portion. Window recording is perfect for creating app tutorials, recording video calls in specific apps, or capturing gameplay without desktop clutter.
HDR and SDR Capture Formats:
macOS Tahoe 26 adds the ability to choose between HDR (High Dynamic Range) and SDR (Standard Dynamic Range) for both screenshots and screen recordings.
Access the option:
Shift + Command + 5Format details:
| Type | SDR Format | HDR Format |
|---|---|---|
| Screenshots | PNG (widely compatible) | HEIF (richer colors and dynamic range) |
| Screen recordings | H.264 video format | HEVC video format |
When to use HDR:
When to use SDR (Most Compatible):
Important note: If you view an HDR screenshot on an SDR display, it will automatically display in SDR format. The HDR data is preserved in the file but only visible on compatible displays.
If you have a MacBook Pro with Touch Bar (2016-2020 models), press Shift + Command + 6 to capture the Touch Bar contents.
Note: Apple discontinued the Touch Bar in 2020 with the introduction of the M1 MacBook Pro, but this shortcut still works on older MacBooks that have it.
Here are powerful techniques most Mac users don’t know about:
When you need to capture your entire screen or a specific area while menus and tooltips are open, use the timer method since these elements disappear when you click:
Shift + Command + 5This captures the full context with the menu or tooltip visible in the screenshot.
To capture just the dropdown menu, popover, tooltip, or dialog itself (without the rest of the screen):
Shift + Command + 4, then press Spacebar (cursor becomes a camera icon)This isolates the dropdown, submenu, popover, or document-modal dialog as a standalone screenshot.
Add Control to any screenshot shortcut:
Ctrl + Shift + Command + 3 - entire screen to clipboardCtrl + Shift + Command + 4 - selected area to clipboardCtrl + Shift + Command + 4 + Spacebar - window to clipboardThis is incredibly useful for pasting directly into Messages, Mail, or documents without creating a file.
When using multiple displays, press Shift + Command + 3 to capture all screens as separate files. To capture just one display:
Shift + Command + 4Spacebar and click the desktop of that displayWhen the thumbnail appears in the bottom-right corner:
Markup tools include:
Pro tip: This is perfect for quickly annotating screenshots before sharing. Add an arrow pointing to a UI element or circle an error message, all within seconds.
Stop saving screenshots to your desktop. Here’s how to customize where they go, what format they use, and more.
Using Screenshot app:
Shift + Command + 5Recommended locations:
For more control, use Terminal to set a custom location:
defaults write com.apple.screencapture location ~/Pictures/ScreenshotsReplace ~/Pictures/Screenshots with your desired path. Create the folder first if it doesn’t exist:
mkdir ~/Pictures/ScreenshotsThen restart the SystemUIServer to apply changes:
killall SystemUIServerTo reset to default (Desktop):
defaults delete com.apple.screencapture locationkillall SystemUIServerBy default, macOS saves screenshots as PNG (high quality, larger file size). You can change this to JPG, PDF, GIF, or TIFF.
Change to JPG (smaller files):
defaults write com.apple.screencapture type jpgkillall SystemUIServerAvailable formats:
png - Default, lossless quality, larger filesjpg - Compressed, smaller files, slight quality losspdf - Vector format, good for documentsgif - Legacy format, limited colorstiff - Lossless, very large filesWhen to use JPG: If you take many screenshots and want to save disk space, especially for images that don’t need pixel-perfect quality like web page captures.
When to stick with PNG: For UI documentation, design work, or anything requiring exact pixel reproduction.
To reset to PNG:
defaults write com.apple.screencapture type pngkillall SystemUIServerIf you find the floating thumbnail distracting:
defaults write com.apple.screencapture show-thumbnail -bool falsekillall SystemUIServerTo re-enable:
defaults write com.apple.screencapture show-thumbnail -bool truekillall SystemUIServerBy default, screenshots are named “Screenshot [date] at [time].png”. To change the prefix:
defaults write com.apple.screencapture name "MyScreenshot"killall SystemUIServerScreenshots will now be named “MyScreenshot [date] at [time].png”.
To reset to default:
defaults delete com.apple.screencapture namekillall SystemUIServerTo remove the timestamp entirely (not recommended, as files will overwrite each other):
defaults write com.apple.screencapture include-date -bool falsekillall SystemUIServerTo remove the shadow from window screenshots globally:
defaults write com.apple.screencapture disable-shadow -bool truekillall SystemUIServerOr, hold Option when clicking a window to temporarily disable shadow for just that screenshot.
To re-enable shadows:
defaults write com.apple.screencapture disable-shadow -bool falsekillall SystemUIServerWhile macOS’s built-in tools are powerful, third-party apps offer advanced features like scrolling capture, better annotation, cloud sync, OCR, and workflow automation.
Best for: Power users, content creators, and professionals who take screenshots daily
Price: $29 one-time (App + Cloud Basic with 1GB storage), or $8/user/month for Cloud Pro (billed annually, unlimited storage)
CleanShot X is the most popular premium screenshot app for Mac, and for good reason. It replaces macOS’s native screenshot tools with a vastly superior experience.
Standout features:
Scrolling capture lets you capture entire web pages, long documents, or chat conversations as a single image. Works in nearly every app, not just browsers.
Quick Access Overlay appears after every capture with instant options to save, copy, annotate, or drag-and-drop to other apps. Configurable auto-close behavior and multi-display support.
Cloud integration uploads screenshots instantly to CleanShot Cloud and copies a shareable link to your clipboard. Basic plan includes 1GB storage, Pro plan offers unlimited storage with custom domain and branding.
Annotation tools are extensive and native-feeling. Includes arrows (4 styles), rectangles, ellipses, blur, pixelate, spotlight, counter marks, highlighter, and text tool with 7 predefined styles. Save as editable CleanShot project files.
Background tool creates beautiful social media posts by adding backgrounds to screenshots with automatic balance, padding adjustment, and aspect ratio control. 10 beautiful backgrounds included plus custom background support.
OCR (text recognition) performs completely on-device. Capture any non-selectable text from images, videos, or scanned documents without retyping.
Screen recording with MP4 or GIF output, microphone and computer audio capture, built-in video editor, camera overlay, keystroke display, and click visualization.
Pin screenshots to your screen as floating windows that stay on top. Adjust size, opacity, and position with arrow keys.
Self-timer with configurable delays for capturing hover states, tooltips, or menus.
Hide desktop icons automatically cleans up your desktop before recording.
When to use it: Daily screenshot work, creating tutorials and documentation, professional content creation, team collaboration with Cloud Pro, or anyone needing advanced features like scrolling capture and OCR.
Where it falls short: Not free. Cloud Basic (1GB) may be limiting for heavy users. Optional renewal at $19/year for continued updates (though you keep the app forever).
Verdict: If you take more than a few screenshots per week, CleanShot X pays for itself in saved time and frustration. The scrolling capture, annotation tools, and cloud integration make it the best premium option.
Website: https://cleanshot.com/
Best for: Developers and users who want speed and lightweight performance
Price: Free (with upgrade prompts after 30 days), optional paid tiers starting at $9
Shottr is a blazing-fast, feature-rich screenshot app optimized for Apple Silicon Macs. It can be used completely free forever, with the app occasionally asking you to consider upgrading.
Standout features:
Lightweight and fast — under 10MB, barely uses any system resources and launches instantly. Built for Apple Silicon with native performance.
Scrolling capture works on any scrollable content, not just web pages. Capture long code files, chat threads, or design documents.
OCR (text recognition) is built-in and lightning fast. Select any non-selectable text from images and Shottr copies it to clipboard. Also reads QR codes.
Color picker shows hex, RGB, and HSL values when hovering over any pixel. Invaluable for developers and designers.
Screen ruler and measurements let you measure distances between UI elements directly in screenshots.
Annotation tools include text, freehand drawings (with stroke variability and smoothness controls), highlights, spotlights, arrows, rectangles, blur, and pixelate. All with keyboard shortcuts for speed.
Beautiful backgrounds can be added to screenshots for social media posts.
Pin screenshots to your screen as always-on-top floating windows for reference.
Combine screenshots into one image by dragging and dropping multiple captures together.
Resize screenshots and adjust dimensions easily.
Pixelate or remove objects from screenshots with built-in editing tools.
When to use it: When you need a powerful, free alternative to CleanShot X, especially if you’re a developer who needs OCR, color picking, and measurement tools. Perfect for those who want professional features without mandatory payment.
Where it falls short: Cloud upload feature requires activation (paid tier). After 30 days, the app will occasionally prompt you to upgrade. Fewer team collaboration features than CleanShot X.
Verdict: The best free screenshot app for Mac in 2025. Shottr delivers professional-grade features with no required payment, though you’ll see occasional upgrade prompts. For developers who need OCR, measurements, and color picking, it’s exceptional value.
Website: https://shottr.cc/
Best for: Social media creators, bloggers, and anyone who wants gorgeous screenshots without manual editing
Price: Free with watermark, $29.99 one-time (1 device), $54.99 (2 devices), $79.99 (3 devices)
Xnapper automatically beautifies your screenshots with rounded corners, shadows, and attractive backgrounds. It’s designed for creating social media-ready images in seconds.
Standout features:
Auto-beautification applies professional styling instantly. Screenshots get centered on a gradient background with shadows and rounded corners, no editing required. The app automatically balances your screenshots with zero effort.
Automatic redaction is a killer feature. Xnapper automatically detects and blurs sensitive information like emails, credit cards, IP addresses, and API keys. Perfect for sharing screenshots without accidentally exposing private data.
Text recognition (OCR) is built-in and powered by macOS’s vision engine. Select and copy text directly from screenshots without retyping.
Annotation tools include arrows, text, shapes, and blur for quick editing. All processing happens on-device for privacy.
Background options include beautiful mesh gradients, solid colors, images, or transparent backgrounds. Backgrounds automatically adapt to light or dark appearances.
Social media optimization with preset aspect ratios for Instagram, Twitter, and other platforms, plus image compression for smaller file sizes.
When to use it: Creating screenshots for blog posts, social media, presentations, or anywhere visual polish matters. Perfect if you need automatic redaction of sensitive data or want professional-looking screenshots without manual editing.
Where it falls short: No scrolling capture feature. Focused more on beautification than advanced capture techniques. If you need scrolling screenshots, CleanShot X or Shottr are better options.
Verdict: If you create content for the web or social media and want screenshots that look professional instantly, Xnapper is excellent. The automatic redaction feature alone makes it worth considering for anyone sharing screenshots publicly.
Website: https://xnapper.com/
Best for: Educators, trainers, technical writers, and enterprise users creating documentation
Price: Starting at $39/year (individual), $48/year (business), education pricing available
Snagit by TechSmith is a heavyweight screenshot and screen recording tool designed for professional documentation and training materials. As of 2025, Snagit has moved to subscription-only pricing.
Standout features:
Scrolling capture works on any window or web page with automatic or manual scrolling control.
Video recording with webcam overlay, great for tutorial videos and training content.
Extensive annotation tools including callouts, step numbers, arrows, shapes, stamps, and effects. The most comprehensive annotation suite available.
Templates for creating consistent documentation with preset layouts and styles.
Smart capture suggests similar screenshots and helps organize them into projects.
Image editing goes beyond annotation with crop, resize, color adjustment, and effects.
Sharing integrations for Google Drive, Dropbox, Slack, Microsoft Teams, and more.
When to use it: Creating training materials, technical documentation, user guides, or educational content that requires extensive annotation and organization.
Where it falls short: Expensive compared to alternatives. The interface feels dated compared to modern Mac apps. Overkill for casual users who just need occasional screenshots.
Verdict: Snagit is enterprise-grade software for professional documentation work. If you’re creating tutorials, training materials, or detailed technical docs, the features justify the cost. For casual use, it’s overkill.
Website: https://www.techsmith.com/screen-capture.html
| App | Price | Scrolling Capture | OCR | Cloud Sharing | Annotation | Screen Recording | Best For |
|---|---|---|---|---|---|---|---|
| CleanShot X | $29 one-time | Yes | Yes | Yes | Advanced | Yes | Professionals & power users |
| Shottr | Free (paid tiers from $9) | Yes | Yes | No | Good | No | Developers & speed lovers |
| Xnapper | $29.99-$79.99 one-time | No | Yes | No | Good | No | Social media & content creators |
| Snagit | $39-$48/year | Yes | No | Yes | Extensive | Yes | Documentation & training |
Our recommendations:
Possible causes:
Solutions:
Check Screenshot app settings: Press Shift + Command + 5, click Options, and verify “Save to” is set to Desktop.
Reset save location via Terminal:
defaults delete com.apple.screencapture locationkillall SystemUIServerPossible causes:
Solutions:
Check keyboard shortcuts: Go to System Settings > Keyboard > Keyboard Shortcuts > Screenshots and verify shortcuts are enabled.
Reset to defaults: Click Restore Defaults button in the Screenshots section.
Check for conflicts: Some apps like gaming software or productivity tools override these shortcuts. Quit third-party apps and test.
Restart your Mac: Sometimes the screenshot service needs a fresh start.
Problem: Pressing Shift + Command + 3 captures a blank screen or different content than expected.
Solutions:
Make sure the window you want is in focus and active.
If using multiple displays, check which screen is being captured.
Some apps (like video players or secure content) block screenshots for DRM protection. You’ll get a blank image, which is intentional.
Problem: Menu disappears before you can screenshot it.
Solution: Use the Screenshot app timer:
Shift + Command + 5Problem: No thumbnail preview appears after taking a screenshot.
Solutions:
Check if thumbnails are enabled: Press Shift + Command + 5, click Options, and ensure “Show Floating Thumbnail” is checked.
Re-enable via Terminal:
defaults write com.apple.screencapture show-thumbnail -bool truekillall SystemUIServerProblem: Screenshots look blurry or pixelated.
Solutions:
defaults write com.apple.screencapture type pngkillall SystemUIServerMake sure you’re not upscaling screenshots after capture. Take them at the original resolution.
On Retina displays, screenshots are automatically high-resolution. The file size will be larger, which is expected.
Problem: Screenshots have unexpected filenames.
Solution: Reset the screenshot name prefix:
defaults delete com.apple.screencapture namekillall SystemUIServerWhere do screenshots go on Mac?
By default, screenshots save to your Desktop. You can change this location using the Screenshot app (Shift + Command + 5 > Options > Save to) or Terminal commands.
How do I take a screenshot on Mac without keyboard?
Open the Screenshot app manually: Go to Applications > Utilities > Screenshot or search “Screenshot” in Spotlight. This opens the same toolbar as Shift + Command + 5.
Can I take a screenshot of just one window without the background?
Yes. Press Shift + Command + 4, then Spacebar, then hold Option while clicking the window. This captures the window without shadow and with a transparent background (if the app supports it). For a solid transparent background, use third-party apps like CleanShot X.
How do I screenshot a dropdown menu that disappears?
Use the Screenshot app’s timer: Press Shift + Command + 5, set a timer in Options, click Capture, then quickly open the menu before the timer expires.
What is the difference between PNG and JPG for screenshots?
PNG is lossless, meaning perfect quality but larger files. JPG is compressed, meaning smaller files with slight quality loss. Use PNG for UI documentation and design work. Use JPG if you need smaller files for web publishing or have limited storage.
Can macOS take scrolling screenshots natively?
No, macOS doesn’t have built-in scrolling screenshot support. You’ll need third-party apps like CleanShot X, Shottr, or Snagit for this feature.
How do I copy a screenshot to clipboard instead of saving a file?
Add Control to any screenshot shortcut. For example, Ctrl + Shift + Command + 3 copies the entire screen to clipboard. You can also set the save location to Clipboard in the Screenshot app.
Why does my screenshot have a shadow?
Window screenshots (Shift + Command + 4 + Spacebar) include a drop shadow by default. Hold Option while clicking to remove the shadow, or disable it globally using Terminal:
defaults write com.apple.screencapture disable-shadow -bool truekillall SystemUIServerCan I schedule screenshots to be taken automatically?
macOS doesn’t have built-in scheduled screenshots. You can use Automator or third-party apps like Keyboard Maestro to create automated screenshot workflows.
How do I take a screenshot of the login screen?
Press Shift + Command + 3 at the login screen. The screenshot saves to the Desktop of the user account you log into.
Can I screenshot on Mac with one hand?
Yes, if you have a keyboard with a numeric keypad or use accessibility features. Go to System Settings > Accessibility > Keyboard > Accessibility Keyboard to enable an on-screen keyboard, or remap shortcuts to single keys using third-party apps like BetterTouchTool.
How do I find old screenshots?
Use Finder’s search: Press Command + F, select “Desktop” or “This Mac,” then search for “Screenshot” or “Screen Shot” in the filename. You can also sort your Desktop by Date Modified to find recent screenshots.
Taking screenshots on Mac offers flexibility you won’t find on other platforms, from simple keyboard shortcuts to professional third-party apps with cloud integration and advanced editing.
For most users, mastering the native screenshot shortcuts is enough. Remember Shift + Command + 4 for selected areas, add Spacebar for window captures, and press Shift + Command + 5 to access the Screenshot app’s full feature set.
If you take screenshots regularly, invest in a third-party app. CleanShot X is the professional choice with scrolling capture and instant cloud sharing. Shottr offers incredible features completely free, including OCR and scrolling screenshots. Both will save you hours compared to manual editing and file management.
Customize your settings to match your workflow. Change the save location to keep your Desktop clean, switch to JPG format if storage is tight, or disable shadows for cleaner documentation screenshots.
The key is finding the method that fits your needs. Whether you’re documenting bugs, creating tutorials, designing presentations, or just saving memes, macOS gives you the tools to capture exactly what you need, exactly how you need it.
Related: Want to work more efficiently with files on your Mac? Learn How FileMinutes Helps You Find Files Faster on Mac for more productivity tips.