You dragged an app to the Trash, emptied it, and assumed it was gone. But hidden deep in your Library folder are hundreds of megabytes of leftover files: preferences, caches, logs, and support files quietly taking up space. This “app corpse” problem affects nearly every macOS user who’s ever installed and removed software.
Unlike Windows with its uninstaller programs, macOS makes deleting apps deceptively simple: just drag to Trash. But this method leaves behind a trail of hidden files that accumulate over time, wasting storage and potentially causing conflicts with future installations.
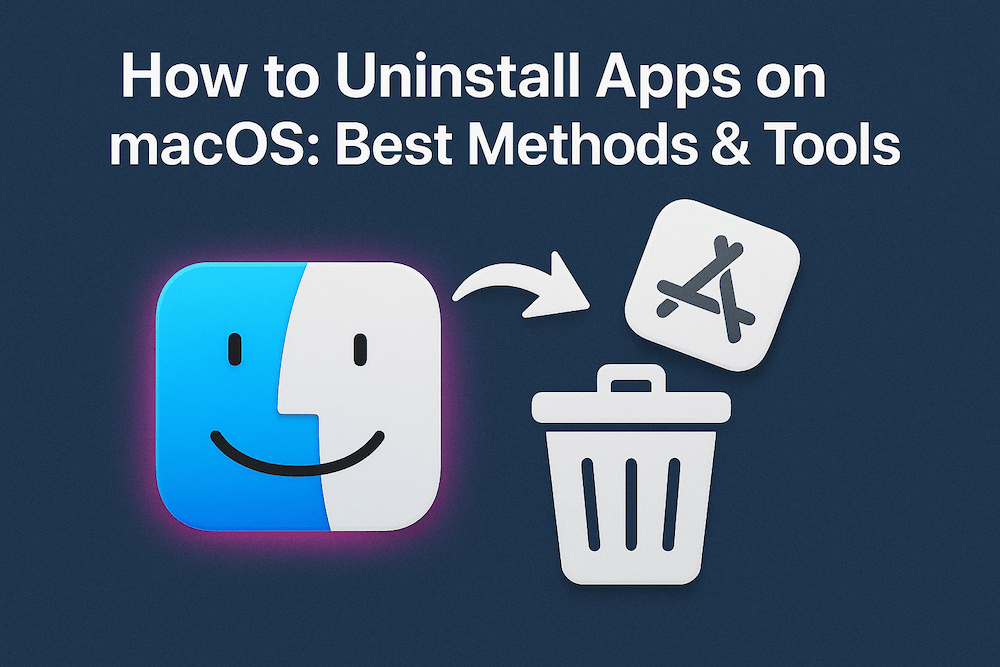
The good news? You have multiple ways to uninstall apps on Mac, some built-in and others requiring third-party tools, each serving different needs. Whether you’re a casual user wanting to free up space or a power user managing dozens of applications, this complete guide covers everything you need to know about properly uninstalling apps on macOS in 2025.
Before diving into the methods, let’s understand why dragging apps to the Trash isn’t enough.
When you install an app on macOS, it creates support files across multiple locations:
When you simply move an app to the Trash, only the main application bundle (usually in /Applications) gets deleted. All these support files remain on your Mac indefinitely, wasting storage space and potentially causing issues if you reinstall the app later.
For most apps, these leftovers are small (a few kilobytes). But for professional applications like Adobe Creative Suite, development tools, or games, leftover files can occupy gigabytes of space. Multiply that across dozens of uninstalled apps over the years, and you’re looking at significant wasted storage.
Let’s start with the methods Apple provides out-of-the-box. These are simple, safe, and don’t require any third-party software.
This is the most straightforward approach and what Apple officially recommends.
How to do it:
Pro tip: Hold Option key while dragging an app to the Trash to delete it immediately without moving it to Trash first. Use this with caution as it bypasses the Trash recovery option.
When to use it: For simple app removal when you don’t need to clean up leftover files, when removing small utility apps that don’t create many support files, or when you plan to reinstall the app later and want to keep your settings and preferences intact.
Limitations: This method only removes the main app bundle. All support files, preferences, caches, and logs remain on your system. For permanent removal, this is incomplete, but it’s ideal if you want to preserve your app configuration for a future reinstall.
For apps downloaded from the Mac App Store, you can uninstall directly from the App Store app.
How to do it:
When to use it: Quick removal of Mac App Store apps without opening Finder.
Limitations: Like the Finder method, this only removes the main app and leaves behind support files.
macOS includes a built-in storage management tool that shows all installed apps and their sizes.
How to do it:
When to use it: When you want to see how much space apps are using before deleting them. Helpful for identifying large apps to remove when storage is low.
Limitations: Still only removes the main app bundle, not support files.
Note: In macOS Sequoia 15 and earlier, you could use Launchpad to delete Mac App Store apps by clicking and holding icons until they jiggled, then clicking the X button. This feature was removed in macOS Tahoe 26.
If you’re on an older macOS version, Launchpad offers a quick way to delete App Store apps, but it still leaves behind support files like the drag-to-Trash method.
Some apps include their own uninstaller within the app itself.
How to find it:
When to use it: Whenever an app provides its own uninstaller. This is the most complete removal method for that specific app, as developers know exactly which files their app created.
Examples: Some antivirus software, VPN clients, and system utilities provide built-in uninstallers.
You cannot delete apps that macOS requires to function, including:
These apps are protected by System Integrity Protection (SIP) and attempting to remove them can cause system instability. Even with SIP disabled (not recommended), deleting these apps may prevent macOS updates and cause unexpected behavior.
For more control over the uninstall process, you can manually remove apps and hunt down their leftover files.
After moving an app to the Trash, you can manually delete its associated files.
Step-by-step process:
Delete the main app - Move the app from /Applications to Trash
Access the Library folder:
Search for leftover files:
Delete app-related items:
Check system-level locations (advanced):
Empty the Trash - Don’t forget to actually delete everything permanently
When to use it: When you want complete control over what gets deleted, or when you only have one or two apps to uninstall and don’t want to install third-party software.
Caution: Be careful when manually deleting files from Library folders. Deleting the wrong file can affect other applications or system functionality. When in doubt, leave it alone or use a third-party uninstaller.
Pro tip: In Finder’s search, use the app’s bundle identifier (like “com.adobe.photoshop”) for more accurate results. You can find the bundle identifier by right-clicking an app, selecting “Show Package Contents,” opening Contents/Info.plist, and looking for CFBundleIdentifier.
For developers and advanced users, Terminal offers powerful uninstallation options, especially for command-line tools and Homebrew packages.
Homebrew is a popular package manager for macOS that installs command-line tools and applications.
Basic uninstall command:
brew uninstall package-nameExamples:
brew uninstall treebrew uninstall nodeForce remove (removes all versions):
brew uninstall --force package-nameRemove dependencies automatically:
When you install a package, Homebrew automatically installs its dependencies. However, uninstalling a package doesn’t remove those dependencies (they might be used by other packages). To clean up unused dependencies:
brew autoremoveThis removes all packages that were installed as dependencies but are no longer needed.
Uninstall cask applications:
Homebrew Cask installs GUI applications. To uninstall:
brew uninstall --cask application-nameThe --zap flag removes all files associated with a cask, including preferences:
brew uninstall --zap --cask application-nameWarning: --zap may remove files shared between applications. Use with caution.
Check dependencies before removing:
To see what depends on a package before removing it:
brew uses package-name --installedList all installed packages:
brew listUninstall all Homebrew packages at once:
brew uninstall --force $(brew list)Again, use this with extreme caution as it removes everything installed via Homebrew.
For advanced users, you can remove applications using rm command:
sudo rm -rf /Applications/AppName.appWarning: This method is dangerous if you’re not careful. The rm -rf command forcefully deletes without confirmation and cannot be undone. Only use this if you know exactly what you’re doing, and triple-check the path before pressing Enter.
When to use Terminal methods: When removing developer tools, command-line utilities, Homebrew packages, or when you need scriptable/automated uninstallation.
Third-party uninstaller apps automate the process of finding and removing all traces of an application, including leftover files scattered across your system. Here are the best options in 2025.
Best for: Users who want simple, effective app removal without spending money
Price: Free (open-source)
AppCleaner is the gold standard for free Mac uninstallers. It’s been around for years, actively maintained, and trusted by millions of users.
What makes AppCleaner special:
The SmartDelete feature is brilliant. Enable it in Preferences, and AppCleaner runs quietly in the background. When you drag any app to the Trash, it automatically detects the action, finds all related files, and asks if you want to delete them too. No need to even launch AppCleaner, it just works.
The interface is dead simple. Drag an app into the AppCleaner window, and it instantly scans and displays all associated files: preferences, caches, support files, and more. Check the items you want to delete (usually everything is pre-selected), click “Delete,” and you’re done.
AppCleaner includes three modes:
You can also view and manage apps that protect themselves from deletion, and search for leftover files from apps you’ve already deleted.
Where AppCleaner falls short:
AppCleaner is focused purely on uninstallation and doesn’t include disk cleaning, optimization, or system maintenance features. If you want an all-in-one solution, you’ll need to look at paid options.
Very occasionally, AppCleaner might miss some deeply-hidden files, though this is rare.
The verdict: For 99% of users, AppCleaner is all you need. It’s free, safe, effective, and has been the community favorite for years on Reddit’s r/mac and Mac forums. Users consistently praise it for “working well enough and the price is right.” Download it and enable SmartDelete, and you’ll never worry about leftover files again.
Website: https://freemacsoft.net/appcleaner/
Best for: Users who want a modern, feature-rich free uninstaller with advanced capabilities
Price: Free (open-source)
Pearcleaner is a newer open-source Mac app cleaner that’s quickly gaining popularity as a modern alternative to AppCleaner. Built with Swift/SwiftUI, it offers a more contemporary interface and additional features beyond basic app uninstallation.
What makes Pearcleaner special:
The feature set is extensive for a free app. Beyond standard app uninstallation, Pearcleaner includes:
The modern interface feels native to macOS 13+ with a clean, detailed design. You can drop apps directly on the Dock icon, and there’s a mini interface mode for quick access.
Pearcleaner is particularly good at finding files associated with apps, though some users on MacRumors forums report it can sometimes be “a bit over enthusiastic” and flag files belonging to other apps. Always review what it wants to delete before confirming.
Where Pearcleaner falls short:
Requires macOS 13.0 or later due to modern Swift/SwiftUI APIs. If you’re on an older macOS version, you’ll need AppCleaner instead.
In some community tests (including comparisons on MacRumors), AppCleaner found more related files than Pearcleaner for certain apps like Dropbox, though the difference is usually minimal. However, Pearcleaner’s Orphaned Files mode can catch leftovers that AppCleaner might miss.
The verdict: Pearcleaner is an excellent modern alternative to AppCleaner, especially if you want extra features like Homebrew management, orphaned file cleanup, and architecture optimization. If you’re on macOS 13+, try both and see which you prefer. For older macOS versions, stick with AppCleaner.
Installation: Download from GitHub (alienator88/Pearcleaner) or install via Homebrew: brew install --cask pearcleaner
Website: https://itsalin.com/appInfo/?id=pearcleaner
Best for: Users who want a productivity launcher that also handles app uninstallation
Price: Free (Uninstaller feature included)
Raycast is a powerful productivity launcher that replaces Spotlight, and it includes a built-in app uninstaller feature. While primarily a launcher, its uninstaller is surprisingly capable and well-integrated.
What makes Raycast special:
The smart scanning automatically finds all files related to an app, including preferences, caches, support files, and logs. You get a complete visual list of everything that will be deleted before removal.
The selective file removal lets you cherry-pick which files to delete. Want to keep preferences for a future reinstall but remove everything else? You can choose exactly what stays and what goes.
Keyboard-driven workflow is fast:
Beyond uninstallation, Raycast includes app launching, clipboard history, window management, snippets, calculator, and thousands of extensions.
Where Raycast falls short:
Requires macOS 12 or later, so older Macs can’t use it.
Not a dedicated uninstaller. While capable, tools like AppCleaner or Pearcleaner that focus solely on uninstallation might catch a few more edge-case files.
Learning curve for the full feature set, though the uninstaller itself is straightforward.
The verdict: If you’re already using Raycast or want a productivity launcher, the uninstaller is a great bonus feature. For dedicated uninstallation only, AppCleaner or Pearcleaner remain better focused options.
Website: https://raycast.com/
Best for: Users who want comprehensive Mac cleaning and maintenance beyond just app uninstallation
Price: $40.20/year (subscription) or $119.95 (one-time purchase)
CleanMyMac X is the most popular paid Mac cleaning utility, developed by MacPaw. It’s notarized by Apple, which means it’s verified for safety and compatibility with macOS.
What makes CleanMyMac special:
The Uninstaller module is incredibly thorough. It scans your entire system for installed apps, automatically locates all associated files (service files, caches, preferences, logs), and removes everything in one click. It can sort apps by size, identify unused or legacy 32-bit software, and show apps from specific developers.
CleanMyMac X also finds and removes leftover files from apps you’ve already deleted manually. This is a lifesaver if you’ve been dragging apps to the Trash for years. CleanMyMac can recover gigabytes of wasted space.
Beyond uninstallation, CleanMyMac X includes:
The interface is beautiful and user-friendly, making it accessible even for non-technical users.
Where CleanMyMac X falls short:
It’s not free. The subscription model costs $40.20/year with ongoing costs, though there’s also a one-time purchase option at $119.95. For users who only need uninstallation, AppCleaner is free and sufficient.
Some users in online communities warn against “cleaner” apps in general, arguing that macOS manages itself well enough. On Apple Community forums, some advised avoiding cleaner apps entirely, saying “they produce only grief and misery.” While CleanMyMac is legitimate and Apple-notarized, it’s fair to say casual users who only need app uninstallation probably don’t need it. Free options like AppCleaner or Pearcleaner are sufficient.
There have been occasional reports of aggressive marketing in the past, though the software itself is solid.
The verdict: If you want an all-in-one Mac maintenance tool and don’t mind paying, CleanMyMac X is excellent. The uninstaller is top-notch, and the additional features provide real value. But if you only need to uninstall apps, stick with free AppCleaner.
Website: https://macpaw.com/cleanmymac
Best for: Users who want a polished, dedicated uninstaller with more features than AppCleaner but less than CleanMyMac X
Price: $14.95/year or $34.95 (one-time purchase)
App Cleaner & Uninstaller by Nektony has won awards for its design (Red Dot Award) and offers a nice balance between features and simplicity.
What makes it special:
The interface is exceptionally user-friendly, showing all installed apps with size, version, last used date, and whether they’re from the App Store. You can sort and filter easily.
It thoroughly removes apps and all associated files in one click, and can also clean up leftovers from previously deleted apps.
Additional features include:
Where it falls short:
At $14.95/year or $34.95 one-time, it’s not free like AppCleaner, but it doesn’t offer the comprehensive suite of tools that CleanMyMac X provides. It sits in an awkward middle ground.
The verdict: If you want something more polished than AppCleaner and are willing to pay a small one-time fee, App Cleaner & Uninstaller is solid. But for most users, AppCleaner (free) or CleanMyMac X (full-featured) are better choices.
Website: https://nektony.com/mac-app-cleaner
Best for: Users who prefer the simplest possible drag-and-drop uninstallation
Price: $19.95 (one-time purchase, free trial for 5 apps)
AppZapper has been around since the early days of macOS and focuses on making uninstallation as simple as dragging and dropping.
What makes AppZapper special:
The drag-and-drop interface is incredibly intuitive. Drag any app onto the AppZapper window, and it instantly finds all related files and lets you “zap” them away with a satisfying animation.
The undo feature is unique. If you accidentally delete an app, you can “unzap” it and restore everything. This safety net is reassuring for less technical users.
Where AppZapper falls short:
At $19.95, it’s more expensive than App Cleaner & Uninstaller ($14.95/year) despite offering fewer features. The free trial limits you to zapping only 5 apps before requiring purchase.
It doesn’t include features like leftover file scanning, extension management, or system cleaning found in competitors.
The verdict: AppZapper is charming and simple, but it’s overpriced for what it offers. AppCleaner is free and does essentially the same thing. Only consider AppZapper if you really love its interface and don’t mind paying.
Website: https://www.appzapper.com/
| Feature | AppCleaner | Pearcleaner | Raycast | CleanMyMac X | App Cleaner & Uninstaller | AppZapper |
|---|---|---|---|---|---|---|
| Price | Free | Free | Free | $40.20/year or $119.95 | $14.95/year or $34.95 | $19.95 one-time |
| Uninstall thoroughness | Excellent | Very Good | Very Good | Excellent | Excellent | Very Good |
| SmartDelete/Sentinel | Yes | Yes | No | No | No | No |
| Find leftover files | Limited | Yes | Yes | Yes | Yes | No |
| Selective file removal | No | Limited | Yes | No | No | No |
| Keyboard-driven | No | No | Yes | No | No | No |
| Productivity launcher | No | No | Yes | No | No | No |
| Homebrew manager | No | Yes | No | No | No | No |
| Architecture removal | No | Yes | No | No | No | No |
| System cleaning | No | No | No | Yes | No | No |
| Malware protection | No | No | No | Yes | No | No |
| Extensions manager | No | No | No | Yes | Yes | No |
| macOS requirement | 10.7+ | 13.0+ | 12.0+ | 10.13+ | All | All |
| Open-source | Yes | Yes (fair-code) | No | No | No | No |
| User-friendliness | Excellent | Excellent | Excellent | Excellent | Excellent | Excellent |
| Best for | Classic free choice | Modern power users | Productivity users | All-in-one tool | Middle-ground | Simplicity lovers |
Choose AppCleaner if: You want a proven, reliable free uninstaller that works on any Mac (even older ones) with the excellent SmartDelete feature. It’s the safe default choice for most users.
Choose Pearcleaner if: You’re running macOS 13+ and want modern features like Homebrew management, orphaned file cleanup, and architecture optimization. Great for developers and power users who want more than basic uninstallation.
Choose Raycast if: You want a productivity launcher with a capable uninstaller built in. Perfect if you value keyboard-driven workflows and selective file removal. Great bonus feature if you’re already using Raycast.
Choose CleanMyMac X if: You want an all-in-one Mac maintenance suite with uninstaller, system cleaning, malware protection, and optimization tools. Worth the cost if you want comprehensive Mac care beyond just app removal.
Choose App Cleaner & Uninstaller if: You want something more polished than the free options with features like extension management and update checking, and don’t mind paying a small one-time fee.
Choose AppZapper if: You really love the drag-and-drop interface and undo feature, though it’s overpriced compared to free alternatives.
For most users: Start with AppCleaner (classic and reliable) or Pearcleaner (modern and feature-rich). Both are free and excellent. If you’re on macOS 13+, try Pearcleaner first for its extra features. If you want a productivity launcher with uninstall capabilities, try Raycast. If you’re on an older Mac or prefer simplicity, stick with AppCleaner.
Follow these guidelines to keep your Mac clean and running smoothly:
Unless you enjoy manually hunting through Library folders, use a third-party uninstaller. Free options like AppCleaner or Pearcleaner are excellent, while CleanMyMac X offers comprehensive paid features. The time saved and peace of mind are worth it.
Some apps, especially system utilities, antivirus software, and VPN clients, provide their own uninstallers. Always check the app’s menu or Help documentation before using other methods. The built-in uninstaller knows exactly what files to remove.
Make sure the application is fully closed before attempting to remove it. If you get a message saying the app “is in use,” quit it completely (Command+Q), check Activity Monitor for background processes, and try again.
Resist the temptation to remove built-in macOS apps like Safari, Mail, or Music. Even if you don’t use them, they’re integral to macOS functionality and updates. Removing them can cause system instability.
Even if you’ve been dragging apps to the Trash for years, it’s not too late. Use Pearcleaner’s Orphaned Files mode, CleanMyMac X’s leftover file scanner, or AppCleaner’s search function to find and remove orphaned files from long-deleted apps.
If you’re planning to uninstall multiple apps or clean up significant amounts of data, create a Time Machine backup first. This lets you restore anything if something goes wrong.
When manually deleting files from Library folders, only delete items you’re absolutely sure are related to the uninstalled app. When in doubt, leave it or use an automated uninstaller. Community wisdom from Reddit and Mac forums emphasizes: always review what an uninstaller wants to delete before confirming, especially with tools that can be overly aggressive.
If you use Homebrew, periodically run brew list to see what’s installed and brew autoremove to clean up unused dependencies. This prevents accumulation of forgotten command-line tools.
Some apps install kernel extensions or launch daemons that run at the system level. After uninstalling these types of apps, restart your Mac to ensure all components are fully removed from memory.
Will uninstalling apps speed up my Mac?
Removing apps frees up disk space but generally won’t improve performance unless you’re deleting apps that run background processes or have login items. Check Activity Monitor to see which apps consume CPU and RAM. Those are the ones that might slow your Mac.
Is it safe to delete everything in ~/Library/Caches?
Generally yes, but it’s not necessary. Cache files are temporary data that apps use to speed up operations. Deleting them frees space, but apps will regenerate caches as needed. Delete individual app caches if you’re troubleshooting issues, but don’t delete the Caches folder itself. Only delete its contents.
What’s the difference between ~/Library and /Library?
~/Library (user Library) contains files specific to your user account. /Library (system Library) contains files for all users. You need admin privileges to modify /Library. Both can contain leftover app files.
Can I recover an app after uninstalling it?
If you emptied the Trash, the app is gone and must be reinstalled. If you used AppZapper, it has an “unzap” feature to restore deleted apps. Otherwise, re-download from the App Store or the developer’s website.
Do I need to uninstall before updating an app?
No. Updates replace the existing app without requiring uninstallation. Only uninstall if you’re experiencing problems and want a completely fresh installation.
Why can’t I delete some apps even with admin password?
Some apps are protected by System Integrity Protection (SIP), macOS’s security feature that prevents modification of critical system files. This includes built-in Apple apps. Even third-party uninstallers cannot bypass SIP for protected apps.
Which apps take up the most space?
Open “About This Mac” > Storage > Manage, then click “Applications” to see which apps use the most space. This helps prioritize what to uninstall if you’re running low on storage.
Are third-party uninstallers safe?
Reputable uninstallers like AppCleaner, CleanMyMac X, and App Cleaner & Uninstaller are safe. Always download from official websites, not third-party download sites. Check for Apple notarization for added security.
What happens if I delete the wrong file from Library?
In most cases, the affected app will simply regenerate the file or create a new default one. Worst case, you might lose app settings or preferences. This is why backups are important before manual cleanup.
Can I uninstall Apple’s default apps?
No, you cannot fully remove apps like Safari, Mail, Music, or other system apps. They’re protected by System Integrity Protection and required for macOS to function properly.
How often should I clean up my Mac?
There’s no set schedule. Clean up when you notice storage running low, experience performance issues, or after uninstalling several apps. For most users, once every few months is sufficient.
Uninstalling apps on macOS doesn’t have to mean leaving behind digital debris. While Apple’s drag-to-Trash method is simple, it’s incomplete. Third-party uninstallers make the process thorough and automatic.
For most users, my recommendation is simple: download AppCleaner or Pearcleaner and enable the SmartDelete/Sentinel feature. Both are free and reliable, ensuring you’ll never leave behind leftover files again. Just drag apps to the Trash like you normally would, and they handle the cleanup automatically.
If you’re on macOS 13+ and want extra features, try Pearcleaner for its Homebrew management, orphaned file cleanup, and architecture optimization. For older Macs or maximum compatibility, stick with AppCleaner. It’s been trusted for over a decade.
If you want comprehensive Mac maintenance beyond uninstallation, CleanMyMac X is worth the investment. It not only thoroughly removes apps but also keeps your entire system clean, secure, and optimized.
For command-line tools and Homebrew packages, use Terminal methods with brew uninstall and brew autoremove to keep your development environment tidy.
Whichever method you choose, your Mac will thank you with more free space, better organization, and fewer potential conflicts. Happy cleaning!
Related: Looking for more ways to boost your Mac productivity? Check out our guide on Everything You Need to Know About macOS Focus Mode to eliminate distractions and stay focused while working on your Mac.